Hand-Building
How to Make a Hand-Built Planter Pot With a Drainage Hole
Build a hand-built planter with drainage hole using slab or coil construction, learn when to cut the hole, and pick a glaze that suits wet soil.
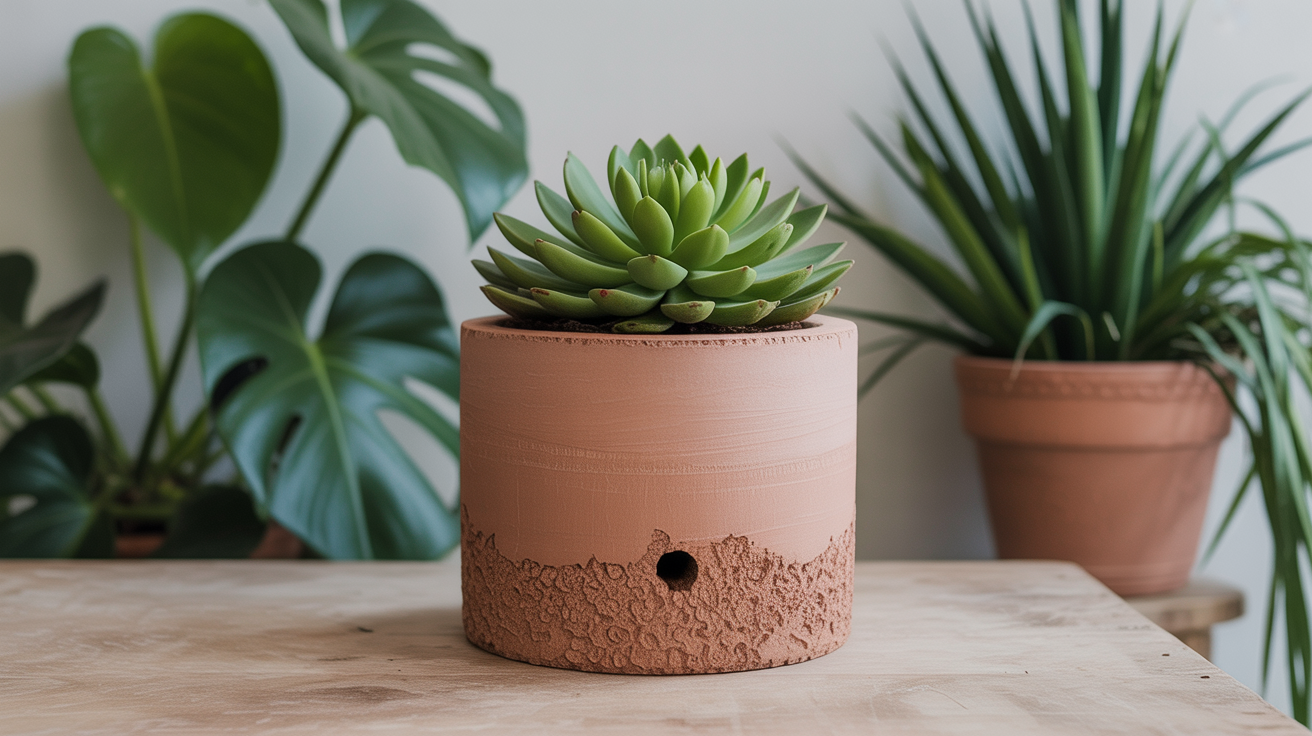
A planter is not the same project as a decorative pot, even though the building steps look almost identical. A planter has to hold soil, survive being watered on a schedule you will not always remember, and let excess water out before the roots sit in a swamp. That last part is the whole reason we're talking about a hand-built planter with drainage hole today instead of a plain hollow form. Get the drainage right and the pot does its job for years. Skip it and you're watering with a measuring cup forever, terrified of drowning your plant.
The good news is that a planter forgives a lot for a first "useful object" to hand-build. It doesn't need to be symmetrical, doesn't need a lid, and a slightly wobbly rim just reads as handmade. What it does need is a plan for wall thickness, a hole cut at the right moment, and a glaze decision that matches how it will actually be used.
Slab or coil: which suits a wide, shorter form
Most houseplants want a pot that's wider than it is tall, or at least not much taller than it is wide, so roots have room to spread. That shape favors two different build methods, and either one will get you there.
Slab building gives you straight or gently curved walls and a flat, stable base almost for free. Roll out a slab, cut a base and wall pieces, score and slip the seams, and join them standing up around the base. It's the faster route to a clean, geometric planter, and the one to reach for if you've already tried slab pottery for beginners and liked how predictable the walls turn out.
Coil building is slower but more forgiving of a wider, organic silhouette. You can flare the walls outward as you climb, which suits a planter that needs to stay stable on a windowsill despite carrying a top-heavy plant. If you haven't built with coils yet, coil pottery for beginners covers the joining technique that keeps a coil wall from delaminating later.
Either way, avoid a true cylinder if you can. A pot that's wider at the belly than at the foot sits lower and steadier once you've added a mature plant and a few inches of damp soil on top. And bigger isn't automatically better for a first attempt: a wide, shallow form, roughly the width of a large dinner plate and half that in height, dries more evenly than a tall narrow one and is easier to reach into for smoothing the interior. Save the ambitious floor planter for your third or fourth try.
Planning wall thickness for something that lives outside
A decorative pot on a shelf can get away with delicate walls. A planter, especially one destined for a porch or patio, cannot. It gets bumped, sits through temperature swings, and holds wet, heavy soil that pushes outward from the inside.
Aim for walls in the range of a thick pencil to a finger's width, and keep that thickness consistent from base to rim. A base that's noticeably thinner than the walls is the most common failure point in a hand-built planter, and the spot most likely to crack during drying, because a thin base dries and shrinks faster than the thicker walls attached to it.
A few habits that help: compress the base firmly with a rib once it's built, both to strengthen it and to push out trapped air. Taper the bottom edge where wall meets base slightly thicker than the rest of the wall, since that transition carries the most stress. And if the planter lives outdoors through freezing winters, know that even well-made stoneware can crack from repeated freeze-thaw cycles while full of wet soil all winter. Bringing it in, or emptying it, is the safer habit regardless of how it was built.
Cutting the drainage hole without cracking the pot
Timing is everything, and it's the step most beginners get wrong in one of two directions: too early, when the clay is still soft and the hole distorts as you cut it, or too late, when the clay is bone dry and shatters under a tool.
The right window is leather-hard, when the clay holds its shape firmly, resists fingerprints, but still cuts cleanly without crumbling. Here's the sequence that works:
- Let the finished base dry until it's leather-hard, checking every hour or so in a warm room.
- Mark the center lightly with a pin tool. One hole is enough for most planters under about 10 inches across; a wider planter can use two or three holes spaced around the center instead.
- Use a small round metal cutter, a drill bit meant for clay, or a sharp knife turned in a slow circle to remove a clean plug rather than punching through in one motion.
- Run a damp finger or a small rib around the inside edge to smooth any burrs, since a rough edge now becomes a chipped, ugly hole after firing.
- Let the piece continue drying slowly and evenly from there. See how to dry pottery before firing so it doesn't crack for the loose-cover method that keeps a base from drying faster than the rim, another classic cause of base cracks.
If the piece dries all the way to bone-dry before you remember, don't force it; cutting bone-dry clay under pressure is exactly how bases crack straight across. Soften the area with a damp sponge for a few minutes before cutting, or accept that this pot becomes a decorative piece without drainage and plan the hole in earlier next time.
Do you need a matching saucer
A saucer solves a real problem: water that drains out has to land somewhere, and that's usually a windowsill, a wood floor, or a plant stand you'd rather not stain. Whether it's worth the extra build time depends on where the planter will live.
For an indoor planter, a saucer is genuinely useful: a simple slab dish a bit wider than the planter's foot, built from the same clay body so both shrink at the same rate. For an outdoor planter on soil, gravel, or a deck with drainage gaps, a saucer is optional, and plenty of outdoor planters skip it and let water drain straight through. If you do make one, keep it shallow; a deep saucer just becomes a reservoir the pot sits in, defeating the purpose of drainage.
Glazing choices for a piece that holds wet soil
This is where a planter's needs diverge from a normal pot's. Constant contact with damp soil, plus the mineral content in tap water and fertilizer, is a harder environment than a vase or a mug ever sees.
Outside surface: glaze it however you like. This is the part people see, so treat it like any other decorative surface, brushed or dipped, as long as the glaze suits your clay body's firing range.
Interior: this is the part beginners overthink. An unglazed, bisque-fired interior is not a flaw in a planter. Bare stoneware or earthenware is porous, which helps by letting a little moisture wick through the wall and evaporate, so roots are less likely to sit in standing water. Plenty of long-lived ceramic planters, including many produced commercially, are left unglazed inside for exactly this reason.
It matters more for a piece meant to hold water directly, like a bulb grown in water, or anything that will be a food-contact surface at some point. Read is your glaze food-safe: what beginners need to know before glazing anything you intend to eat or drink from, since food safety depends on the glaze reaching full maturity in the firing, not on how it looks.
One caveat: an unglazed planter outdoors will slowly absorb moisture through the wall, and over time that can show up as a damp ring or efflorescence (a pale, chalky mineral bloom) near the soil line. It isn't a structural failure, but to avoid it, glaze the interior too, or use the hand-built pot as a decorative cachepot with the plant kept in a plastic nursery pot set inside it.
Frequently Asked Questions
Can I use a straw or pencil to poke the drainage hole instead of cutting one?
At the soft leather-hard stage, yes, a wooden dowel or the end of a paintbrush can push a clean hole through a thin slab base. Once the clay firms up further, a cutting tool that removes a plug of clay works better than poking, since pushing through firmer clay tends to distort the base rather than cut it cleanly.
How big should the drainage hole be?
For a planter under about 8 inches across, a hole roughly the diameter of a pencil is plenty. Larger planters can go bigger or use two to three smaller holes, since one oversized hole in a wide base can become a weak point that cracks during drying or firing.
Will an unglazed planter leak water everywhere?
Not in the way you might picture. Water drains out the hole, and the fired clay wicks a small amount of additional moisture through the porous wall, but it isn't a sieve. Most people set an unglazed planter on a saucer or a plant stand tray and never notice a puddle.
Do I need to bisque fire before glazing a planter?
Yes, the same two-firing process applies as with any other pottery. Bisque firing hardens the clay enough to handle safely and lets it absorb glaze evenly, then the glaze firing matures the glaze on the outside. A planter left bare inside still goes through the bisque firing; it just skips the glaze application step.