Hand-Building
Why Hand-Built Pottery Cracks and How to Prevent It
Find out why clay cracks when drying and get practical tips to prevent drying cracks in your hand-built pottery from pinch pots to slab work.
Clay cracks when it dries because different parts of the piece lose moisture at different rates. The thinner edges dry faster than the thicker walls, and as the clay shrinks, stress builds up at those uneven boundaries until the surface gives way. That single cause explains almost every crack you will encounter as a beginner, and fixing it usually comes down to slowing the drying process and evening out your wall thickness before the piece ever leaves your hands.
Why Clay Shrinks When It Dries
Fresh clay is roughly 20 to 30 percent water by weight. As that water evaporates, the clay particles pack closer together and the whole piece shrinks. Most stoneware bodies shrink somewhere between 10 and 13 percent from wet to bone dry, and then again during firing. That is a significant movement, and the clay has to accommodate it across every inch of the piece at once.
The problem is that water does not leave evenly. Areas exposed to air dry first. Thin sections dry faster than thick ones. Edges, rims, and attachments like handles dry before the belly of a vessel. When one part of a pot wants to shrink while the adjacent part is still wet and flexible, the rigid dry section cracks rather than accommodate the movement.
Understanding this is the first step toward preventing it. You are essentially managing where the water goes and how fast it leaves.
The Most Common Places Cracks Appear
Not all cracks look the same, and where they appear tells you what went wrong.
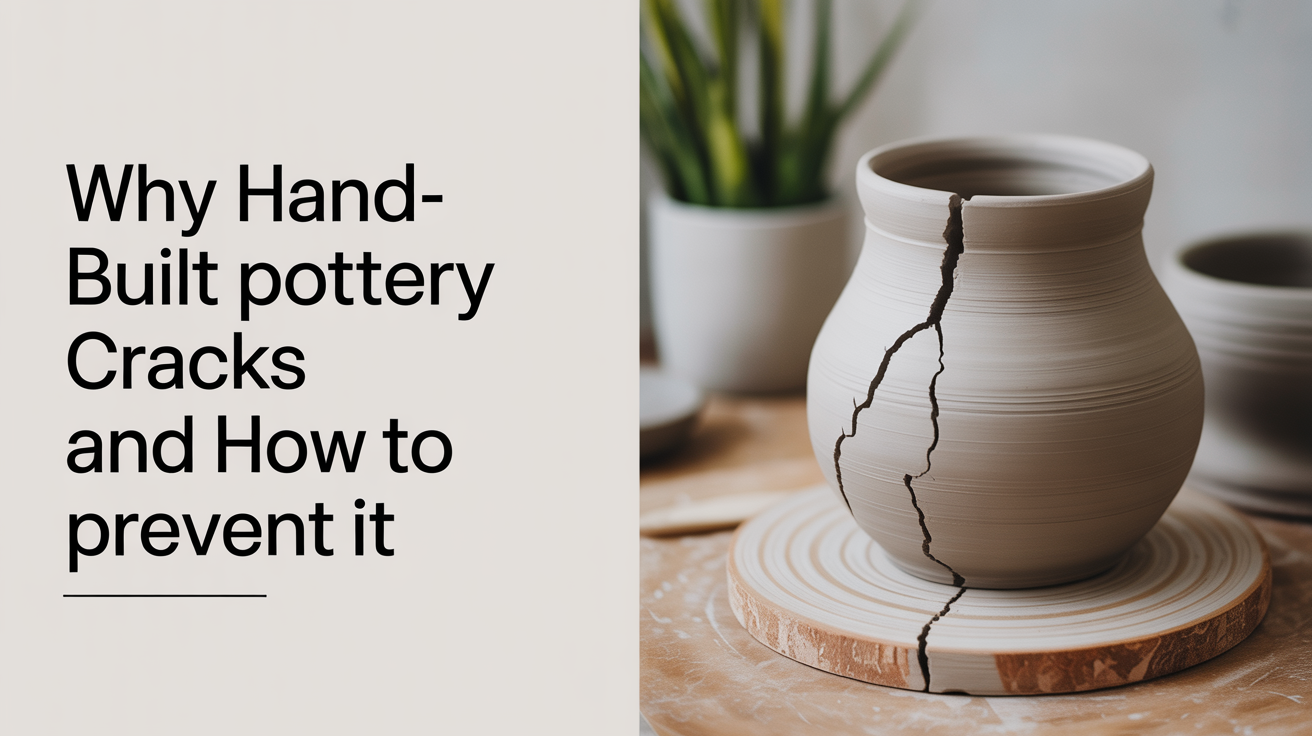
Rim cracks run along or just below the top edge of a pinch pot or coil-built vessel. The rim is the thinnest part and the most exposed, so it dries well ahead of the rest. Covering it with a thin strip of plastic while the body catches up is the standard fix.
Junction cracks appear where two pieces of clay were joined, for example where a handle meets a mug or where coils were pressed together. If the two pieces were at different moisture levels when they were joined, or if the join was not blended thoroughly, the bond breaks as the clay moves.
S-cracks are the S-shaped cracks that appear in the base of wheel-thrown work, but they also show up in slab-built bases. They typically result from uneven compression or from clay that was left too stiff in the center relative to the walls.
Surface cracks that look like a spiderweb or fine hairlines across the body often come from the clay drying too fast in a warm or breezy environment.
How to Prevent Cracks in Hand-Built Work
Even Out Your Wall Thickness
This is the single most effective thing you can do. Walls that vary from 6mm in one spot to 12mm in another will almost always crack. Aim for consistent thickness throughout, using your fingers or a needle tool to check as you work. For pinch pots, start with an even pinch from the base upward. For coil work, blend each coil inside and out so the joins disappear into a continuous wall.
Match Moisture Levels When Joining
Any time you attach two pieces of clay, those pieces need to be at the same stage of dryness. Attaching a soft handle to a leather-hard mug body, or pressing a wet coil onto a stiffer one, creates a weak joint that almost always pulls apart as the piece dries. Score both surfaces, apply slip (clay mixed with water to a creamy consistency), then press and blend firmly.
If you are building with coils, keep your built form covered with plastic between sessions so the whole piece stays at a consistent moisture level. Only add fresh coils to clay that is still soft and workable, not leather-hard.
Slow Down the Drying
Fast drying is the most common cause of pottery cracking while drying. A few practical approaches:
- Cover the piece loosely with plastic sheeting. Loose coverage lets a little air in but dramatically slows evaporation.
- If one area is drying faster than another (usually the rim), drape a thin piece of damp cloth over that section.
- Dry in a cool, still room rather than near a heater or in direct sunlight.
- Let the piece dry for several days or even a week before removing plastic entirely.
There is no award for rushing. A piece dried slowly over a week is far less likely to crack than one rushed dry in a day.
Compress Your Slabs Before Building
Slab-built pieces have a specific vulnerability: the clay particles in a rolled slab are still somewhat disorganized, and unless you compress the surface, micro-cracks can develop as the slab dries and shrinks. After rolling, use a rib or your hand to smooth firmly over both faces of the slab. This aligns the particles and strengthens the surface.
When building with slabs, let the slabs firm up to soft leather-hard before assembling. Floppy, freshly rolled slabs warp and crack. The walls need enough stiffness to hold their shape while the joins dry.
Support the Base
A flat base with no internal support will try to crack if it dries faster than the walls or if there is nothing holding it flat. Place your piece on a piece of foam, a bat, or a piece of dry cloth so air can circulate evenly under the base. Avoid placing wet work directly on a porous wooden board, which can pull moisture from the base faster than the rest of the piece.
Quick Reference: Crack Type and Cause
| Crack type | Where it appears | Likely cause |
|---|---|---|
| Rim crack | Top edge of vessels | Rim drying faster than body |
| Junction crack | Handles, coil joins, attachments | Mismatched moisture or poor blending |
| S-crack | Base of pot | Uneven compression, stiff center clay |
| Hairline web | Across surface | Too-fast drying, dry air or heat |
| Split join | Where two slabs meet | Slab too wet or too dry when joined |
Frequently Asked Questions
Can a cracked pot be repaired? It depends on when the crack appears and how deep it goes. A hairline crack in bone-dry clay can sometimes be filled with a slip or a commercial clay repair compound before bisque firing, but deep or through-cracks rarely survive the kiln intact. The best use of a cracked piece is as a lesson: study where the crack started to figure out what drying condition caused it.
Why did my piece crack in the kiln if it looked fine when dry? A piece that arrives at the kiln with invisible micro-cracks can split open during firing. Rapid temperature rise in the early stages of firing (particularly around 573C / 1063F when quartz inversion occurs) puts stress on weak spots. Ask your kiln operator if they use a slow bisque ramp, which is standard practice for hand-built work.
Does the type of clay affect how likely cracking is? Yes. Grogged clays, which contain fired clay particles in the body, are more forgiving because the grog gives the clay a skeleton that resists shrinkage cracking. Many potters recommend starting with a grogged stoneware for hand-building precisely because it dries more evenly. Porcelain and smooth fine-particle clays are beautiful but less forgiving and tend to crack more readily under uneven drying.
My coils are cracking as I add them. What am I doing wrong? The coils themselves are probably drying out before you add them. Keep coils covered with plastic or a damp cloth while you roll the next one. If the coils are too stiff when you press them onto the wall, they will not bond properly and the join will crack. Working with soft, fresh coils makes blending much easier.
Is it normal for some cracking on the first few pieces? Completely. Managing drying is a skill that develops alongside building. Most beginners lose a piece or two to drying cracks before they develop the habit of covering work consistently and checking thickness as they go. Do not discard the cracked pieces immediately. Keeping them lets you compare the crack locations across several pieces and notice your own patterns.