Firing & Kilns
How a Pottery Kiln Works: A Beginner's Guide
Learn how a pottery kiln works, from heating elements and thermocouples to firing schedules and witness cones. A clear, practical guide for beginners.
A pottery kiln is an insulated oven that heats clay and glaze to temperatures well beyond what a kitchen oven can reach. Most beginners work with electric kilns that climb to cone 06 (roughly 1828°F / 998°C) for bisqueware or cone 6 (about 2232°F / 1222°C) for stoneware glazes. Understanding what happens inside the kiln helps you load it better, write smarter firing schedules, and diagnose problems before they ruin a whole shelf of work.
What a Kiln Actually Is
At its simplest, a kiln is a heavily insulated box that traps and concentrates heat. The walls are made from firebrick or ceramic fiber, both of which reflect heat inward and slow its escape. Inside that insulated shell, heating elements (in electric kilns) or burners (in gas kilns) raise the air temperature high enough to permanently harden clay.
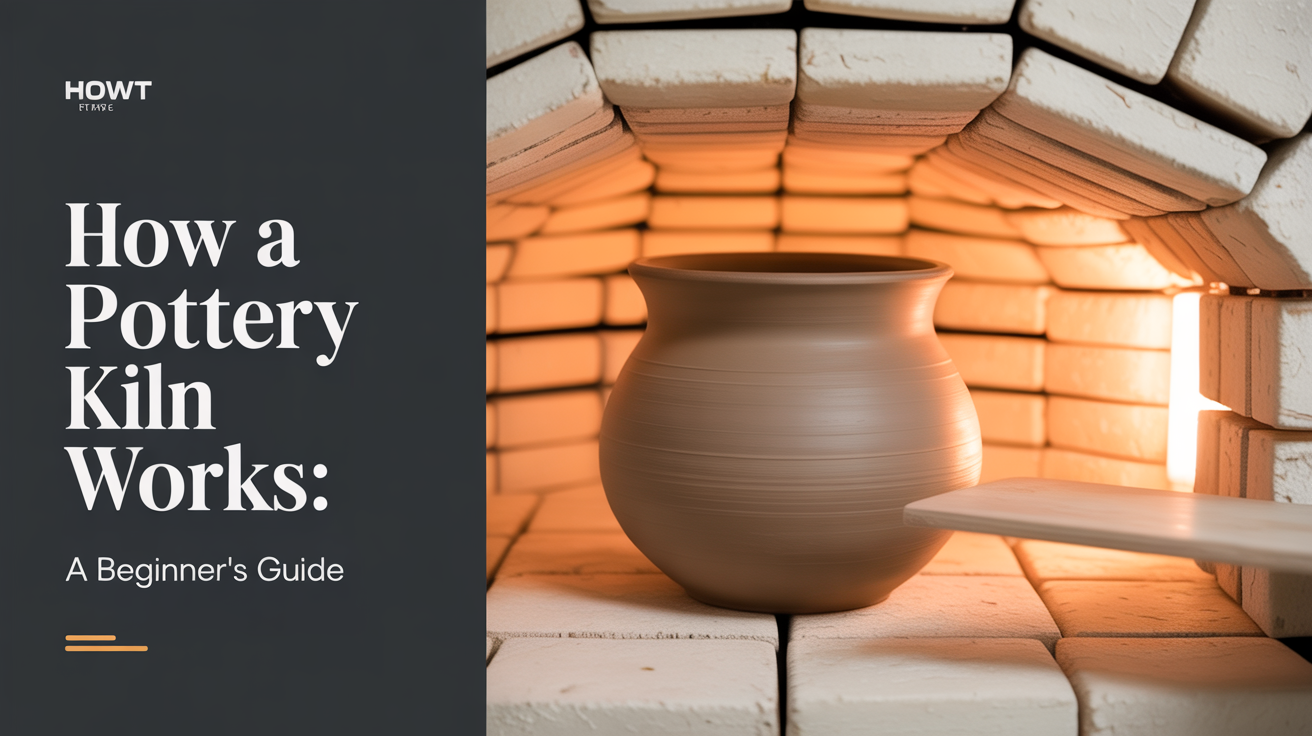
The kiln's interior is called the chamber. Pots sit on flat shelves made from cordierite or silicon carbide, separated by posts that allow heat to circulate. Loading correctly matters: crowded shelves block airflow, and glazed pieces touching each other will fuse solid by the end of a firing.
How Electric Kilns Generate Heat
Electric kilns use resistance wire or coiled elements, usually made from a nickel-chromium alloy called Kanthal. When current flows through these elements, the resistance converts electrical energy to heat, much like a toaster element. The elements run around the inner walls of the kiln in horizontal grooves, so heat radiates evenly from multiple levels.
A standard studio kiln draws serious current. A small test kiln (like a seven-inch cube) might run on 120 volts, but most production kilns require 240-volt, 60-amp dedicated circuits. Never plug a full-size kiln into a standard outlet or run an extension cord to one. Improper wiring is a fire hazard, and element failure from voltage fluctuation is common. Have a licensed electrician install the circuit before your kiln arrives.
The kiln's elements do wear out. They become brittle over hundreds of firings and eventually burn through. Replacing them is a normal part of kiln ownership, roughly every 100 to 200 firings depending on how high you fire.
The Role of the Controller and Thermocouple
Two components work together to manage temperature: the thermocouple and the controller.
A thermocouple is a sensor made from two different metal wires joined at one end. When that junction heats up, it generates a small voltage proportional to the temperature. The controller reads that voltage and converts it to a temperature reading. Most electric kilns use Type K thermocouples for lower-fire work or Type S thermocouples for higher cone ranges.
The controller takes that temperature data and decides when to switch the elements on or off. Older kilns used mechanical switches (called kiln-sitters) that relied on a small cone to physically trip a shutoff lever. Modern digital controllers let you program ramps and holds precisely.
| Kiln Part | What It Does |
|---|---|
| Firebrick / ceramic fiber walls | Insulate the chamber and reflect heat inward |
| Heating elements | Convert electricity to radiant heat |
| Thermocouple | Measures temperature inside the chamber |
| Digital controller | Reads the thermocouple and switches elements on/off |
| Kiln shelves | Support pots and allow heat to circulate |
| Kiln posts | Elevate shelves to create airflow between layers |
| Peephole | Small opening to observe witness cones during firing |
| Vent | Draws out fumes, steam, and combustion gases |
Ramps, Holds, and Why Firing Schedules Matter
A firing schedule is a series of temperature segments: how fast to climb (the ramp rate), what temperature to hold, and for how long. You almost never want to heat clay as fast as possible. Rapid temperature changes cause thermal shock, which cracks pots.
The most critical slow phase is the early part of a bisque firing. Between room temperature and about 250°F (121°C), free water still trapped in the clay turns to steam. Above 1000°F (538°C), chemically bonded water burns off. Both transitions release gases. If the kiln heats too quickly, that steam has nowhere to go except through the wall of your pot, blowing it apart.
A typical bisque schedule for hand-built or thick work looks something like this:
- Ramp 1: 27°F/hour (15°C/hour) to 250°F, hold 30 minutes
- Ramp 2: 100°F/hour (56°C/hour) to 1000°F, no hold
- Ramp 3: 180°F/hour (100°C/hour) to cone 06 (1828°F), hold 10 minutes
Once the kiln reaches its target cone, it needs to cool slowly too. Opening a hot kiln causes thermal shock, same as heating too fast. Most controllers let you program a controlled cool for the first few hundred degrees. After that, the kiln can cool on its own with the lid cracked a couple of inches.
If you are new to firing schedules, the article on bisque firing vs. glaze firing covers how the two stages differ and what happens chemically during each one.
Witness Cones and How to Know the Kiln Did Its Job
Temperature alone does not tell the whole story. What matters is heat work, the combined effect of temperature and time on the clay and glaze. A cone is a small pyramid of ceramic material that bends at a specific heat-work value. You place witness cones inside the kiln (on a shelf visible through the peephole) and check them during and after firing to confirm the firing achieved what you intended.
Cones are numbered in a confusing way. The "zero" cones run from cone 022 (the coolest, around 1087°F) up to cone 01. Then the numbering restarts at cone 1 and climbs to cone 14, which tops out around 2489°F. Lower-fire earthenware glazes typically mature around cone 06 to cone 04. Most stoneware is fired to cone 6 (mid-fire) or cone 10 (high-fire).
If your witness cone is still standing straight, the kiln underfired. If it is flat, it overfired. A properly bent cone should be curved over at roughly a 90-degree angle, with the tip touching or just short of the shelf.
Ventilation and Safety
Kilns produce fumes. During bisque, organic material in the clay burns off. During glaze firings, certain colorants and glaze additives release gases you do not want to breathe. Carbon monoxide is a risk with gas kilns and can also be a concern with combustible materials fired in an electric kiln.
Ventilation options include:
- Downdraft vents: A small fan attaches to the bottom of the kiln and draws air down through the elements, pulling fumes out through a duct. These are the most common setup for studio kilns.
- Room ventilation: Even with a downdraft vent, fire in a space with an exterior window or exhaust fan. A dedicated kiln room with a powered exhaust is ideal.
- Peephole venting: Leaving peepholes open during the early phases of a firing (while organics burn off) helps gas escape.
Never fire in an unventilated basement or closet. Beyond fumes, kilns radiate significant heat. Keep flammable materials well away from the kiln's exterior, and never leave a firing completely unattended for long stretches. Something like a cracked element can cause a runaway firing, and a controller glitch (rare but possible) can hold the kiln at full temperature indefinitely.
Before you fire your first piece, read the guidance on how to dry pottery before firing. Wet clay in a fast-heating kiln is one of the most common reasons beginners lose work.
Electric vs. Gas Kilns: A Brief Comparison
Most studio potters start with electric kilns, and for good reason. They are cleaner, easier to control, and less expensive to install than gas kilns. They also fire in oxidation (lots of oxygen), which gives bright, predictable glaze results for most commercial glazes.
Gas kilns can fire in reduction, a process where the burners are turned down to create a fuel-rich atmosphere with less oxygen. Reduction pulls oxygen out of metal oxides in the glaze and clay body, producing effects like copper reds, celadons, and the speckled flashing on wood-fire surfaces. These effects are very difficult to replicate in an electric kiln.
For most beginners, an electric kiln is the right tool. They are reliable, repeatable, and forgiving. Gas kilns require more space, better ventilation infrastructure, and a steeper learning curve for reading the atmosphere inside the chamber.
If you do not have access to a kiln at all yet, there are options worth knowing: see what to do if you don't have a kiln for a practical look at community studios, local firing services, and low-fire alternatives.
Frequently Asked Questions
How hot does a pottery kiln get?
It depends on what you are firing. Low-fire work (earthenware, terracotta) typically fires between cone 06 and cone 04, which is roughly 1828°F to 1945°F (998°C to 1063°C). Mid-fire stoneware fires to cone 6, around 2232°F (1222°C). High-fire stoneware or porcelain can reach cone 10, about 2345°F (1285°C). Each clay body and glaze has a recommended cone range on its label or data sheet.
How long does a kiln firing take?
A bisque firing for standard studio work usually takes 8 to 12 hours to reach temperature, then several hours to cool before you can open the lid. Glaze firings often run shorter, 6 to 8 hours, because the clay is already vitrified and can heat a bit faster. Total time from room temperature to safe-open is often 18 to 24 hours for a full load.
Can you open a kiln while it is firing?
Briefly, yes. Many potters open the peephole to check witness cones or, in very early phases, to help moisture escape. Opening the lid partway mid-firing is occasionally done in specific situations, but it lets heat escape rapidly and can cause thermal shock to pieces near the top. In general, keep the lid closed and trust your schedule and witness cones.
Why did my pots crack in the kiln?
Cracking usually comes down to one of three causes: the clay was not fully dry before loading, the kiln heated too quickly through the water-burnoff phases, or the piece had uneven wall thickness that caused differential thermal expansion. Cracks that look like explosions usually mean trapped steam. Cracks that run along joins or seams usually mean the pieces were not well-attached when built, or dried too unevenly.
Do electric kilns need special wiring?
Yes. Any kiln over about 1.5 kW needs a dedicated 240-volt circuit with the correct amperage for that specific model (typically 30 to 60 amps). The circuit must be wired with the right gauge wire and the correct breaker. This is not a DIY job unless you are a licensed electrician. Check the kiln's spec sheet for exact requirements, and have the installation inspected before the first firing.