Wheel Throwing
How to Open the Clay and Set an Even Floor
Learn how to open clay on the wheel and set an even floor. Step-by-step technique for beginners to build a solid base for any thrown pot.
Opening the clay is the first moment the lump actually becomes a vessel. You have centered, the clay is spinning true, and now you need to push down into the middle and spread outward to create a floor. Get this step right and every wall you pull after it will have a solid foundation. Get it wrong and you will fight the pot all the way to trimming.
This guide walks through opening clay on the wheel from the initial push to checking floor thickness, with common mistakes and how to fix them.
Before You Open: A Word on Setup
If your clay is not fully centered, opening will make the problem worse, not better. Before you push down, take a moment to confirm the clay is spinning without wobble. Lay a finger lightly against the side and watch it stay still against the clay. If the clay pushes your hand around in a rhythm, go back and center a bit more.
Also confirm your hands are wet but not dripping. A thin film of water lubricates the movement. Too much water weakens the clay over multiple pulls.
For a beginner working with a 450-gram ball, the finished floor should sit roughly 6-8 mm thick. For 900 grams, aim for 8-10 mm. These numbers are guides, not rules. You will calibrate by feel and by the needle tool test described below.
If you want a fuller picture of how centering feeds into this step, the guide on centering clay on the pottery wheel covers that foundation in depth.
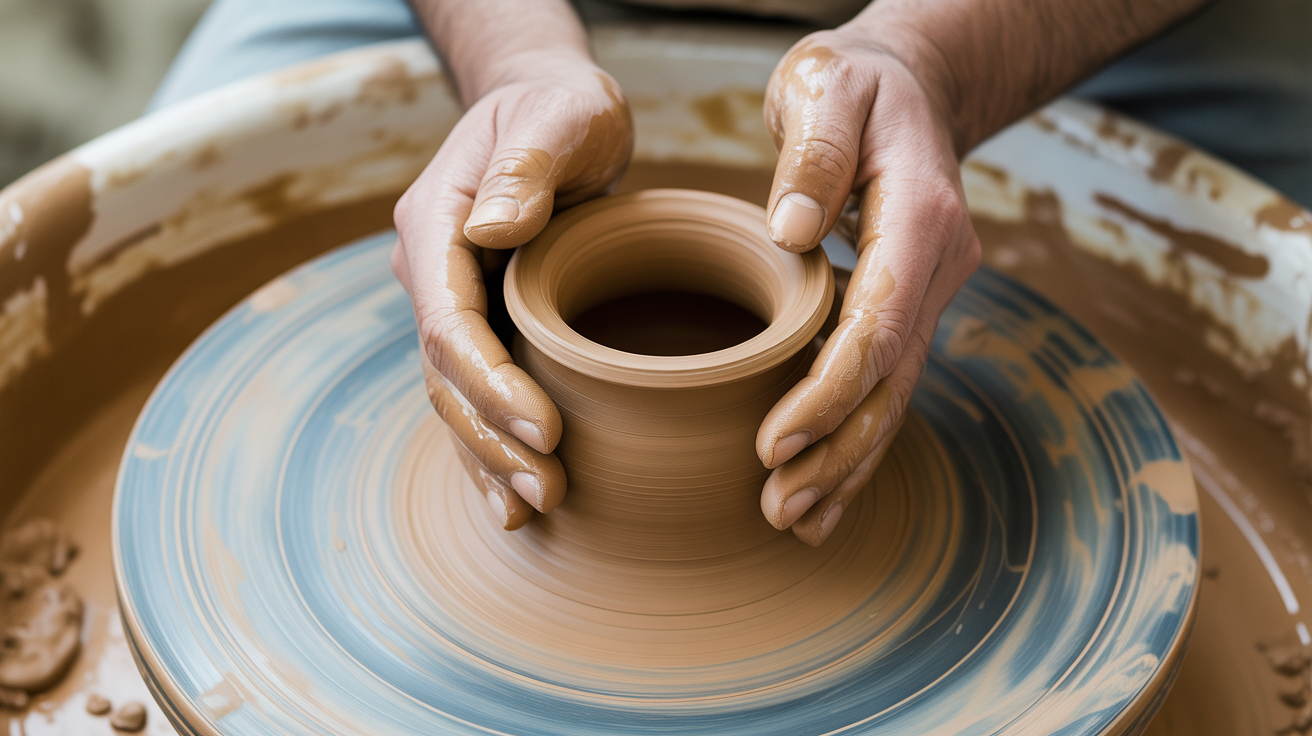
How to Push Down: The Opening Move
Bring the wheel to a medium-fast speed. Place your dominant hand flat on top of the clay, fingers pointing toward the wheel head. Press your thumb and the heel of your palm down into the center of the clay. Do not stab with a fingertip. Use the full pad of your thumb or two fingers pressed together so the opening stays round and controlled.
Push straight down first, stopping about 6-10 mm above the wheel head. You are not going all the way to the bottom yet. You are creating a well.
Keep your other hand resting on the outside of the clay to brace it. If you only push with one hand and nothing holds the outside, the clay wanders off-center.
Once the well is formed, slow the wheel slightly and begin moving your fingers outward, toward the far wall. This is the actual opening. Move slowly and steadily. Fast outward movement drags ridges into the floor that become waves in the base of your finished pot.
Setting the Base: Moving Outward Evenly
The goal of setting the base is to widen the floor while keeping it level. Uneven floors cause problems at every stage: walls pull unevenly, pots wobble on a table, and trimming becomes difficult because you cannot tell how much clay is actually there.
To keep the floor level as you open, think of your fingers as moving in a single smooth arc. Start at the center and sweep outward. Do not lift your fingers mid-move. Lifting and re-placing creates bumps.
Stop the outward movement about 12-15 mm before you reach the desired inner wall position. You will refine the wall edge in a moment. For now, leave a bit of extra clay at the outer boundary.
Here is a simple sequence to follow:
- Push down to form the well.
- Begin moving outward slowly at a consistent depth.
- Pause with your fingers resting on the floor and feel for level. Ridges or slopes are easy to detect at low wheel speed.
- Make one more smooth pass outward if needed.
- Compress the floor with a flat finger or a small rib.
Compressing the floor is not optional. A floor that has been stretched without compression develops cracks as the clay dries. One or two slow, firm passes with a rib or the flat of your finger aligns the clay particles and seals the surface.
Checking Floor Thickness: The Needle Tool Test
The most reliable way to check even floor thickness throwing is the needle tool test. Push the needle straight down into the floor until you feel it touch the wheel head. Pinch the needle at the surface of the clay and lift it out. The distance from your pinch to the needle tip is the floor thickness.
Do this in three spots: center, midway, and near the inner wall. The numbers should be close to each other. If the center is much thicker than the edges, you opened unevenly. If the edges are thinner than the center, the outer sweep was too aggressive.
A common beginner result is a thick center mound left in the middle because the initial push stopped short. If you find this, wet your fingers, slow the wheel, and do a focused outward pass starting from the center bump.
One check: the outer 15-20 mm of the floor connects to the future wall. This area should be slightly thicker than the rest of the floor because the wall material comes from that clay. Do not thin it out in the opening step.
Quick Reference: Opening Steps and Common Fixes
| Step | What to Do | Common Problem | Fix |
|---|---|---|---|
| Push down | Use thumb pad or two fingers, straight down | Lopsided well | Brace outside wall with other hand |
| Sweep outward | Slow, continuous arc from center to edge | Ridges on floor | Slow down, use steady pressure |
| Compress floor | Rib or flat finger, 1-2 passes | Cracks during drying | Always compress before pulling walls |
| Check thickness | Needle tool in 3 spots | Uneven readings | Identify thick spot, do one corrective pass |
| Refine inner wall | Smooth the outer boundary of the floor | Ragged wall base | Use a slow wheel and light touch |
Connecting Opening to Your First Pull
Once the floor is set and compressed, you are ready to begin pulling the walls. The floor determines how tall your pot can go. A thicker floor gives you more clay to pull up later if you want a taller form. A thinner floor limits your options.
Before you start pulling, look down into the pot and check that the floor looks even in color. Thinner clay looks slightly different and shinier because it holds moisture differently. Dark wet patches in the middle of an otherwise drier floor often signal a thin spot.
The step-by-step wheel throwing guide for beginners picks up from exactly this point and walks through pulling walls, shaping, and finishing the rim.
Also worth noting: the quality of your opening depends heavily on how well the clay was prepared before it ever touched the wheel. Wedging clay properly removes air pockets that can cause the floor to buckle or stick unevenly as you open.
Frequently Asked Questions
Why does my floor have a raised bump in the center? This happens when the initial downward push stops too soon. The fingers moved outward before reaching the center, leaving a mound. Fix it by doing a focused downward pass directly in the center, then sweeping outward again slowly.
How do I know when the floor is the right thickness? Use the needle tool test described above. For a small beginner pot, 6-10 mm is a reasonable target. A thinner floor is not necessarily better. Very thin floors crack during drying and collapse during trimming.
My opening keeps going off-center. What am I doing wrong? This almost always traces back to centering. If the clay was not perfectly centered before you started, the opening will amplify the off-center movement. The other cause is opening at too high a wheel speed. Slow the wheel down slightly when you move from pushing down to moving outward.
Can I open the clay in one step instead of two? Some potters push down and sweep outward in a single continuous motion. This works fine once you have the muscle memory. As a beginner, breaking it into two distinct steps gives you more control and a chance to check your position before committing to the outward move.
What is the difference between compressing the floor and smoothing it? Smoothing removes ridges. Compressing is a deliberate firm pressure applied slowly to the clay while the wheel turns. They can happen in the same pass, but compression is what actually prevents drying cracks. A light skim over the surface does not do the same job as a firm, even press with a flat tool or finger pad.